Friday, December 30, 2011

Cheesy Artichoke Dip

We always celebrate Christmas at my mom's with appetizers galore and this year was no different.  This is the dip I brought and everyone went crazy over it.  I think it would be a great addition to any of your New Year's parties and its super simple to make.  If I do it again, I am going to sprinke bread crumbs mixed with parmesan cheese for a crispy crust, but its just fine without it.  The leftovers did't last long in the fridge.  This recipe makes a huge au gratin pan of this as well as this smaller gratin dish of dip so its great for a large crowd.

2 bars of cream cheese softened
1 1/2 cup mayo
1/2 cup sour cream
4 green onions sliced thin (Whites and tops)
1- 8 oz jar of roasted red peppers chopped
2- 6 oz jars of marinated artichoke hearts drained.....I save the juice for marinating chicken etc....
2 cups motzarella cheese shredded
1 cup grated parmesan cheese
3 tsp Franks Red Hot
3 tsp L&P Worchestershire sauce
Salt
Fresh Ground Pepper

Preheat oven to 350

In a large bowl with hand mixer mix cream cheese till fluffy and then add mayo and beat it till smooth, add cheeses, mix then add veggies and sauces.  Salt and pepper to taste.  Bake in 350 oven 30-40 minutes.   I added cheese on top which turned a nice golden brown in the oven.  Serve with crackers or crudites.  I have wasa crackers shown here.  Enjoy

Friday, December 23, 2011

Cranberry Orange Scones


I had never had a scone until my recent vacation to Hawaii in November.  While we were on Maui for my Friend Elaine's Wedding (see earlier post for her photo), she had a Royal Wedding themed Bridal shower.  We enjoyed pimm's cocktails, cucumber sandwiches and fresh blueberry scones.  Later on our trip she took us on an Upland Adventure to the Alii Kula Lavender farm.  I scarfed on a wonderful lavender scone and some lavender tea.  The aromas and views from the lavender farm were amazing and I highly recommend you stop here if you ever get the chance.  There are sweeping views of the moutains and you may even see a para glider, which we were fortunate enough to see.  The protea flowers are something to take note of, not to mention the 55000 lavender plants and 45 varieties.  They grow this all at an elevation of 4000 ft....which maybe why I can never grow lavendar worth a darn.  But I do love the smell off it!

So ever since we came back to the mainland, I dream about those scones and the ocean view we saw from their balcony.  Scones are so delicious.  I never thought much of them, never even tasted one but now I am a believer and I decided to make them for my boyfriend's cousin's morning Christmas party we are attending tomorrow.  I found this recipe in my Barefoot Contessa at Home Cookbook by Ina Garten.  (One of the few food network chefs I adore) The recipe calls for a cup of dried cranberries, but  I had abut a cup of fresh cranberries hanging out in the fridge and I think fresh is always better, don't you?

Recipe:
4 Cups All purpose flour + 1/4 cup
1/4 cup granulted sugar + extra for sprinkling
2 tbsp baking powder
2 tsp orange zest
3 sticks cold unsalted butter diced
4 eggs beaten
1 cup heavy cream
1/2 c confectioner's sugar
1 small orange juiced

400 degree oven

Mix 4 c flour and sugar, baking powder, salt and orange zest in your mixer.  Add the cold butter and mix at the lowest speed.  In a separate bowl whisk the egg and cream, then slowly add to the dry ingredients until just blended.  In a food processor, pulse the cranberries to a rough chop and add the 1/4 cup of flour to the berries.  Add to mixer till combined.  Dump the dough ball on a well floured board and with your hands roll it out to about a 1" thickness.  I used a mason jar to punch out the biscuits.  If I made these again, I would get the bigger sugar crystals to sprinkle on the top, but I just used the granulated. Bake for 20 minutes.   Mix up the powdered sugar and juice of the orange and drizzle over the scones! Can't wait for these tomorrow morning!  Merry Christmas everyone and thanks for reading my blog.

Tuesday, December 13, 2011

Cucumber Avocado Soup

So continuing on my journey of eating raw foods, I decided to give this soup a try.  I am still feeling good and having more energy and sneezing and wheezing a lot less.  Now I am just waiting for the weight loss they keep talking about.  Its so funny to hear people say being healthy costs so much.  I've actually reduced the grocery bill.  And if you are thinking about this, you will save much more by being healthy in the long run by reducing your healthcare bills.  Seriously people, a bag of carrots is $1.69.  Yes it takes a while to clean up after yourself, but its time you are disconnected from facebook, cell phone, internet and you can really just think about things while you clean up the juicer, food processor etc.  So this soup, it was really cheap.  The avocado was .99.  The cucumber was .39.  The lime was .39.  I added a clove of garlic to this and some salt. But seriously, I can spend over $7.00 on lunch at the cafeteria sometimes. 

So I threw the avocado and seeded cucumber in the food processor along with the zest of the lime, a minced clove of garlic and a dash of salt.  The cilantro garnish is optional, but it gave it a little punch of flavor I thoroughly enjoyed. 

Thursday, December 8, 2011

Healthy Smoothie

Next year is going to be a banner year for me!!! Once again, I have resolved to get healthy!  As I mentioned in my last post, I have been using my juicer and trying aspects of the raw diet.  Today I whipped up this smoothie with things I pulled out of the fridge, trying to use it up before it dies in my fridge!!  If you are up for trying new things, this blog is for you!

I've never tried flax seeds before but there are a myriad of health benefits from these little babies....including fighting cholesteral, diabetes, cancer, constipation, inflammation, menapausal symptoms, heart disease and atypical depression!!  I added a tablespoon to this smoothie.  I have continued to have more energy, not have those 3pm crashes and still have not had to take an allergy pill for almost 2 weeks and have had a lot less congestion. 
I also added about 3 tbsp almond butter which I haven't made before.  Super easy!!!

1 cup almonds, 2 tbsp olive oil and pulse to desired consistency in the food processor!

Smoothie

8oz plain yogurt
2 spears pineapple
1/3 cup mango pieces...just now realized I left the frozen strawberries in the microwave!!!! oops!
1/2 cup spinach leaves
1/4 cup almond butter
1/2 cup almond milk
1 tbsp flaxseed.

I did this in the food processor also because its pretty thick and my blender couldn't take it.  Its more of a meal than a shake anyway!!! If you want to thin it out, add more almond milk, a couple ice cubes or some pure water.  Yummy!

Saturday, December 3, 2011

Butternut Squash Soup

Its always this time of year when the weather is cold, I want something to warm me up.  I love soups!  When I was in college, I bought Campbell's condensed soups like they were going out of style.  Who knew you could make your own for a fraction of the price?  The more I got into cooking, I made the basics, Chicken noodle, vegetable....My Grandma always made cream of broccoli, but I could never master the milk and butter part till later in life.  I've honed my soup making abilities and here is a great soup for anyone. 

I haven't been blogging because I was on vacation for 2 weeks and I am still trying to catch up.  Today was one of the first days I have had to just relax and I admit, I am still in my pajamas and it is after 1 pm.  While on vacation, I met a girl who was telling me all about detoxing and how she has so much energy now because she is eating raw foods and smoothies and she lost 25 pounds to boot.  She suggested I read Clean by Alejandro Junger.  When I got home I immediately bought it off Amazon and read it in 2 days.  I can't go into it whole hog.  I cheat, I eat candy, dairy and tacos....its the holidays and my will power has left me...

So I got out my Jack Lalanne and started juicing for my morning meal, have tried a couple of the recipes for the lunches and tried to stick to salad for the most part.  It is surprising to me that just after a week of doing this, I have not struggled to get up for work last week, I am notorious for snoozing through my alarm.  In fact I woke before the alarm went off, I have not had to take an allergy pill this week for sinus pain, headache, constant sneezing and runny nose.  And I haven't had the 3pm crash where I feel like I am going to fall asleep at my desk.   

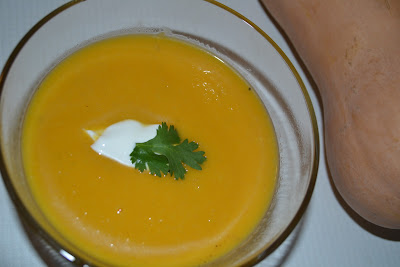
I feel good, and supposably the rewards keep on coming, but like I say, I cheat at this but, give me a break, its the holidays!  I do want to see what other benefits I can reap from eating fresh greens, fruits and less wheat and gluten.  Today I tried my own version of Butternut Squash soup which I still had hanging around the kitchen from the tail end of the farmer's market.  I read several recipes on online blogs and the 2 in the Clean book but synthesized my own recipe.

1 large butternut squash peeled and chopped and cooked for about an 50 minutes at 450 degrees
1 tbsp olive oil
1/2 large red onion chopped
4 stalks celery diced
2 cloves minced garlic
4 cups chicken broth
1/2 lite coconut milk
salt and pepper and the tiniest of pinches of nutmeg (optional)
small dollop of plain greek yogurt for garnish and 1 leaf of cilantro

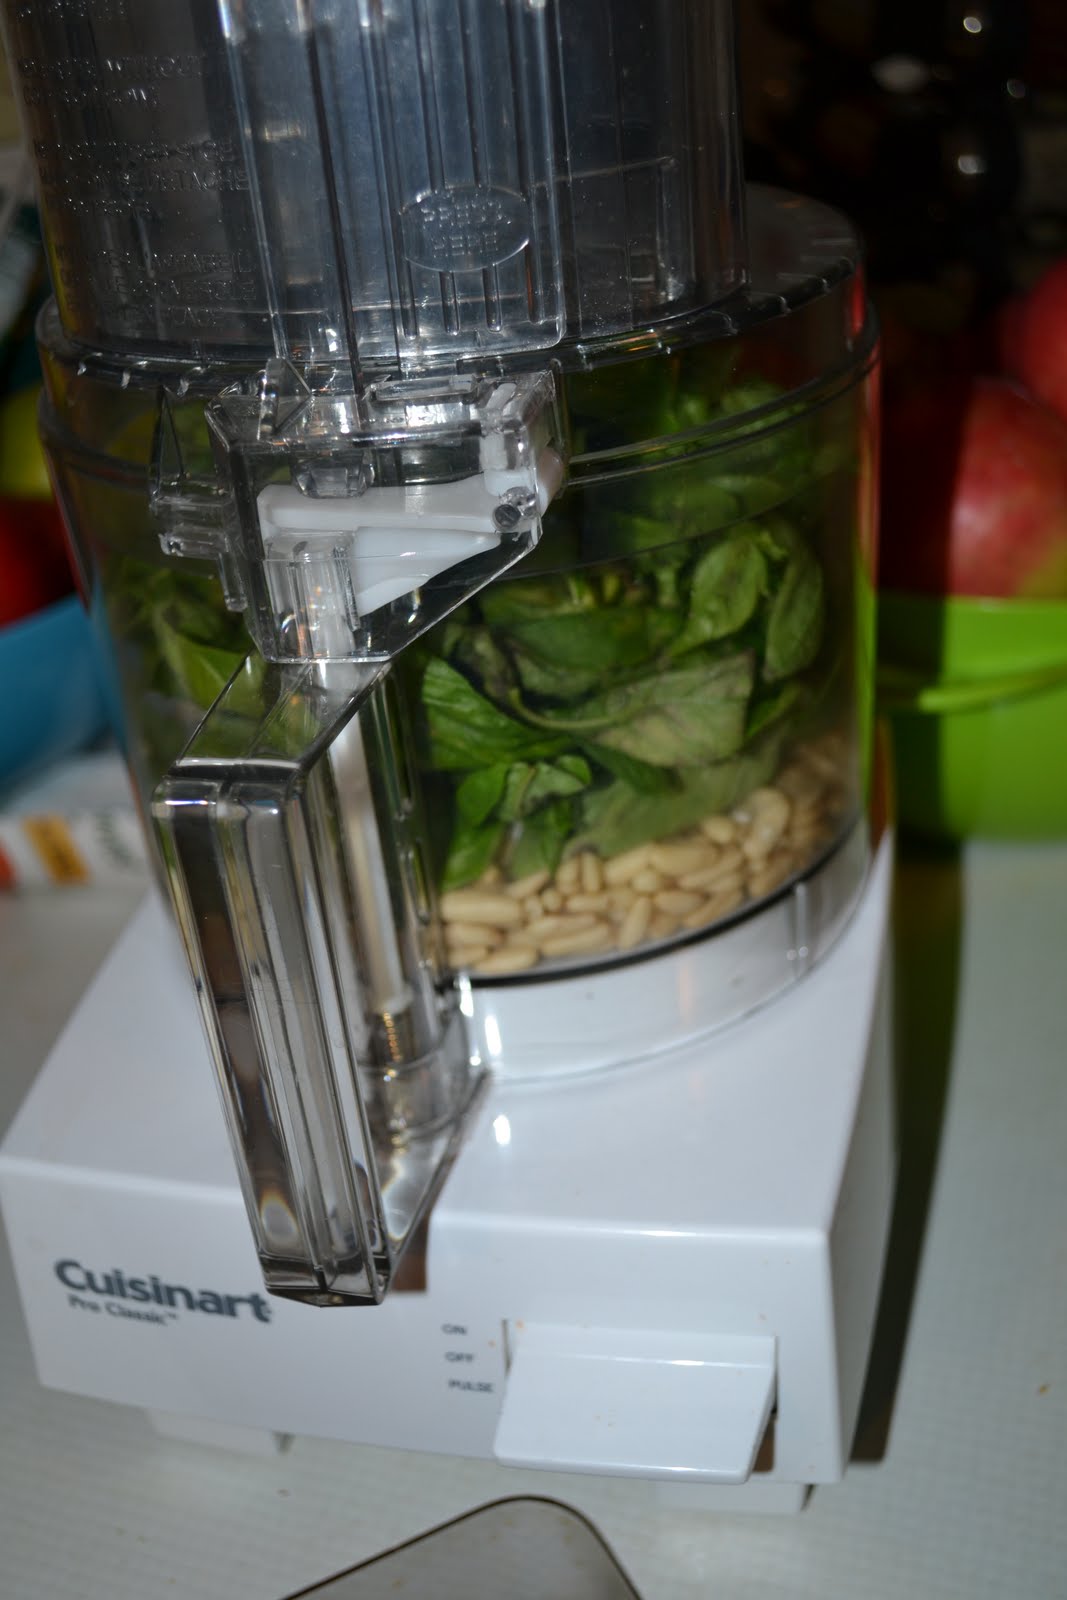
In a dutch oven or stockpot, drizzle oil till warm add celery and onion cook till almost tender and add the garlic.  Pour in chicken (or vegetable broth) 2 cups at a time till you reach desired consistency and bring to a boil. Turn off heat.  With an immersion blender puree the veggies in the pot or use your blender/food processor....I prefer the tiny chunks in mine, seems a bit more rustic!  Stir in coconut milk and add garnish. Yum.  And remember kids, Butternut Squash has a whole host of health benefits, such as being high in fiber, low in fat to aid in weight loss, potassium, folate, omega 3s to prevent strokes, Vitamin B6, Beta Carotene/Vitamin A and Magnesium.  Be sure to check out the book Clean by Alejandro Junger, some reviews say your body's natural healing abilities will be restored, insulin levels regulated, and your liver detoxified, and we don't have to suffer any longer, nor feel tired, sick and weighed down with the sludge of modern life.

Don't forget this is DELICIOUS!

Tuesday, October 18, 2011

Pumpkin Praline Muffins

Some of life's best inventions come from improvision.  (Is that a word? I was going to use improvising, but I think that's a dangling participle.  Oops inner geek alert!)  Anyway, Monday was Boss' day and I had been planning all weekend to make a pumpkin cheesecake to take into work.  Well, at 3pm on Sunday, I realized my springform pan was somewhere in a dank storage unit.  Clearly, I had no motivation, nor the time to truck on over and go digging around in my menagerie of a storage unit.  I wanted to bring a fall treat using the ingredients I already had on hand.  As I was sifting through my Better Homes and Gardens Baking book, the recipe for Pumpkin Praline Muffins called out to me.....Make me, make me!!!  I have loved pralines since about the age of 9.  There used to be a little ice cream shop here in town named the Big Scoop.  This is where I had Pecan praline ice cream for the first time and so began a life long love affair!  The pralines in these muffins are super simple to make and the Boss' as well as the other members on my team gave me such kudos, and I am now the go-to gal of baking in the office....sorry not trying to brag.  Like my cousin says, we just show our love and appreciation for others with the food we make.  Try these.....as Miles said, they are "To die for!" 

The recipe I am making was altered.....I only had 1/2 a cup of pumpkin puree in the fridge and no time to cook down another pie pumpkin so I improvised and used applesauce. I don't think it mattered much....people scarffed on these babies!

Preheat oven to 375.  This only made 14 muffins so you may want to double this recipe.

1/3 c brown sugar
2 tbsp sour cream
2/3 chopped pecans
2 C all purpose flour
2 tsp baking powder
1 tsp ground cinnamon
1/2 tsp baking soda
1/4 tsp salt
1/4 tsp ground nutmeg
1/8 tsp ground cloves
1 beaten egg
3/4 c buttermilk
1/2 c pumpkin puree
1/4 c applesauce
1 tsp vanilla
2/3 cup packed brown sugar
1/3 c butter melted

Line muffin pan, in a small mixing bowl, stir together 1/3 c brown sugar and sour cream. Stir in pecans set aside

In a medium mixing bowl combine flour, baking powder, cinnamon, baking soda, salt, nutmeg and cloves. Make a well in the center of the dry mixture

In another bowl combine egg, buttermilk, pumpkin, vanilla,  2/3 cup brown sugar and melted butter. Add the wet mixture to the dry mixture and stir till well combined.  It will be a really thick batter. I use a large cookie scoop or an ice cream scoop to make the muffins a uniform size. Fill each cup about 3/4 full.  Then spoon 2 tsp pecan mixture on top of each muffin.  Bake @ 375 for 25 minutes.  Best served warm. 

Wednesday, October 12, 2011

Marinated Cherry Tomatoes

The weather this Spring was weird, very wet and rainy.  There were days I didn't think it would ever quit raining.  I always look forward to Spring and seeing all the flowers pop up and I love watching things grow!  I have always wanted my own garden and one of the most romantic things any boyfriend has ever done for me was to have a truckload of dirt dropped off in their driveway all for me.  I mean, he picked out a spot and we shoveled all the dirt and he put the preen down.  What a dream boat!  The next weekend we went and got the plants.  I remember him telling me at the start of this project that the plants had to be in that night before he got home.  This was back in June.  They were.  I think he was very leary about this whole undertaking.  We ended up with a bumper crop of cherry tomatoes.  They arrived after the hot hot month July midway into August.  I had bowls and bowls full of them.  The plants grew to be eight feet high and I had to buy bamboo stakes to hold them up! The garden was a success.  It produced a ton of hungarian and green peppers as well as many many cherry tomatoes.  I am not looking forward to buying them at the store again.

Canning is another one of my pastimes.  I love seeing the results after they've processed.  I picked up the Better homes and gardens special canning issue and decided to make these Cherry tomato pickles I read about!  They are like a ketchup sunburst exploding in your mouth.  My friend Becky provided me with a rosemary plant earlier this summer and my friend Chelsea bought me a bottle of WHITE BALSAMIC VINEGAR for my birthday, each gift helped out with this epicurian treat!

Pickled Pear Tomatoes with Rosemary

5 Cups yellow pear cherry tomatoes, round red cherry tomatoes and I used some black japanese heirloom cherry tomatoes that I grew!
1 cup thinly sliced chipolini onions
1/2 tsp crushed red pepper
6 cloves of garlic thinly sliced.  Bellevue Farmers market has the BEST garlic!
2 1/4 C White balsamic vinegar
3/4 C water
1/3 cup sugar
3 tbsp pickling salt
1 tbsp or more fresh rosemary
1 1/2  tsp peppercorns
1 bay leaf


Combine tomatoes, onion, red pepper flakes and garlic in a bowl.

Brine: Combine vinegar, water, sugar, salt, rosemary leaves, peppercorns and bayleaf in a larg heavy saucepan.  I used my dutch oven for this step.  Bring to boiling reduce heat. simmer 10 minutes and discard the bayleaf.

Pack tomato mix tightly in the jar till you can't fit another single tomato in the jar. ( I used half pint jelly jars) Pour the hot brine over tomatoes. Leave 1/2 inch headspace.   Remove air bubbles and adjust your lids. Process in water bath canner for 15 minutes. Makes 7 half pints and they're super pretty to look at!

Monday, October 10, 2011

Macaroni and Cheese

I love comfort food....I love food in general. But every fall, there are several dishes I make every year. Macaroni and Cheese just happens to be one of them. My boyfriend's dad just retired and they decided to have a bonfire for family and friends to celebrate. Everyone brought a dish to pass and so I opted to make the macaroni and cheese because several others said they would make cupcakes. Which is fine because at the end of the night, there wasn't a crumb left. You can use any old cheeses you have sitting in the fridge with this recipe. Some of the combos I've used were gruyere and emmental, parmesan and asiago but for his get together, I used cabot sharp white cheddar and extra sharp cheddar. You can use those bag cheeses but seriously, spend the money on good cheese instead of gross processed cheese you will notice a huge difference. I make quick work of the shredding by using my grater disk attachment for my food processor. This Macaroni and Cheese beats anything you'll find in a box. I altered this recipe a touch from gourmet magazine.

20 servings

Topping
1/2 stick butter
1-3/4 Cups Panko bread crumbs
1/4 Cup Extra Sharp Cheddar
1/2 cup Parmesan cheese

Sauce
1 Stick butter
6 Tbsp Flour
5 cups whole milk
6 cups cheese
1/2 cup parmesan
1 lb box elbow macaroni

Preheat oven to 400
Melt butter Stir together with panko and topping cheeses in a bowl set aside.

Sauce:
Melt butter in a heavy saucepan over medium low heat and stir in flour Cook the roux about 3 minutes and whisk in milk. ( I make this in a 5 1/2 qt dutch oven ) Bring sauce to a boil whisking constantly then simmer stirring occasionally 3 minutes....Don't leave this alone, because you will scald the milk on the bottom of the pan. Stir in cheeses 2 tsp salt 1/2 tsp pepper until smooth remove from heat.

Cook your macaroni and drain stir together with the cheese and put in greased 9x13 pan. Put on top rack of your oven. On the lower rack, put a cookie sheet otherwise, you will have your oven smoking because this baby will over flow. Sprinkle topping evenly over macaroni and bake for 20-25 minutes.

Friday, September 30, 2011

Pumpkin Cupcakes


I am finally going to admit that I am enjoying this weather. There's a chill in the air, and isn't it nice to greet some of your sweaters that have been hanging in your closet all summer long? Or what about wrapping up in a blanket with a nice hot cup of tea and a pumpkin cupcake?
A lady at work was having a birthday and this was a perfect excuse to volunteer to make some cupcakes! Even better, I had 2 pie pumpkins wasting away on the kitchen table to use! I mentioned in a prior blog how much I like squash and my first encounter with fresh cooked pumpkin was when I was living in Traverse City. I loved their farmer's market and I picked up a couple small pumpkins to make pumpkin butter. The flavor was so good you will never want to use that canned crap again! The recipe I used for the cupcakes called for canned pumpkin, but if you have the time, seriously consider using fresh....it makes a world of difference. These little pumpkin babies are so sugar sweet yummy. Everyone at work today was telling me how good these are and I'm not going to lie, I fell in love with a cupcake! Don't tell my boyfriend! The smell when you peel down the cupcake wrapper is so intoxicating! The first bite is to DIE FOR! This cake is so moist and delicious, dust off those Kitchen Aid Mixers ladies and get baking!
I adapted this recipe from one I found on the Smitten Kitchen Blog.
Pumpkin Cupcakes with Maple Cream Cheese Frosting
Makes about 18 cupcakes
1 Stick unsalted Butter room temperature
1 cup packed brown sugar
1/3 cup sugar
2 cups flour
2 tsp baking powder
1 tsp baking soda
1 tsp cinnamon plus more for sprinkling
1 tsp ginger
1/2 tsp nutmeg
1/8 tsp cloves
1/2 tsp salt
1/8 tsp black pepper
2 eggs
1/2 c buttermilk mixed with 1 tsp vanilla
1 - 1/3 cup fresh pureed pumpkin
Frosting:
2 bars of cream cheese room temperature
1 stick butter room temp
2 cups powdered sugar
1/4 c pure maple syrup
Beat butter and sugar till fluffy, sift flour baking soda, baking powder, and spices in a med bowl.
Add eggs 1 at time to the sugar mixture scraping down the sides of the bowl after each addition. Add a little of the flour mixture and then a little of the buttermilk till till all is combined. Beat in pumpkin until smooth. Fill each well of the lined muffin pan about 3/4 way full. Bake at 350 21-25 minutes until cake tester comes out clean.
Frosting:
Beat all ingredients till fluffy. Frost after cakes have cooled on wire rack. Store in fridge.
Roasting pumpkin: Chop the pumpkin in quarters or thirds scrape out strings and seeds and place cut side down on a sheet pan bake at 450 for 30-45 minutes or until its tender. Once its down the outer skin should easily peel away. Put in bowl of food processor and pulse till its pureed. Put into a fine seive and drain excess water about 30 minutes. You could do this step the day before and just let it chill in the fridge overnight. You could also do a big batch of this and freeze the extra for your Thanksgiving Pumpkin Pie!

Sunday, September 25, 2011

Pear and Blue Cheese Tart


There's so much to savor once the fall weather sets in. I love seeing all the pumpkins and hard squashes and gourds. I love seeing the leaves change. I love apple time. I am always so heartbroken to see summer leave but there's so much fun in fall, I start to forget about it. I love warm sweaters and sweatshirts. For a few years, I hosted my annual fondue parties. I would have 5-10 pots of fondues and had friends bring their own bottles of wine. Those were some of the funnest times of my life! My good friend E (who is getting married in just over a month) plotted with her sister Kelly who lives in Chicago. Kelly asked if she could bring a couple friends, I was like sure, the more the merrier! Kelly and her friends arrived just as I was finishing about 3 kinds of fondue at once. They kept saying they needed help with some bags. I sent my friend Lisa out to help. She came back and said they still needed my help. A little put off, I rushed out to the trunk to help get these bags that could not wait, and out popped E! She lived in California at the time so I never expected her!!! I was so shocked but so happy!! That prank is still one of the best ones anyone ever pulled off on me!!!
One of the dishes I made that night was my pear and blue cheese tart. It pairs really nicely with a reisling and the punch of the salty blue cheese with the sandy texture of the pear is just heaven.
For this tart I used 3 varieties of pear, Red, Bosc and Bartlett, but truthfully, the next time I make t, I will use Red pears only, because they are the sweetest and my favorite. I also used the honey I bought earlier this summer from Beetree Farms. The Beekeeper Jan told me buckwheat honey is much stronger flavored, but I love it, its so much better than the generic honey bears I used to buy. Buy the best, stinkiest blue cheese you can afford, like a nice Stilton or Maytag. I really think quality ingredients make all the difference.
One thing I noticed is that puff pastry sheets have shrunk, the squares were so tiny I use both and had ingredients leftover.
I got this recipe from Tyler Florence's EAT THIS BOOK but I made changes:
1 lb of blanched almonds. I used about a half pound and had a lot of paste leftover!
1/4 cup sugar
1/4 cup brown sugar
3 pears sliced longwise I used red, bartlett and bosc
about 2 oz blue cheese crumbled
3 tbsp honey
1 pkg puff pastry
Unfold thawed pastry onto 2 pans, cut a rectangle about 1 inch from edge of pastry and prick inside rectangle with a fork. In a food processor pulse almonds and sugar with 2 tbsp water till makes a rough paste, slice pears long wise removing seeds if desired. Drop crumbled chunks of blue cheese over the pears, and drizzle a generous amount of honey over tarts. Bake at 400 for 30 minutes.
E and Me in New Hampshire at Kelly's Wedding!

Tuesday, September 20, 2011

Perfect Pesto


I had 2 bunches of basil leftover from pastapalooza and I wasn't about to see my money go down the drain. I got this awesome canning mag from Meijer's early this summer to which I owe the credit for my delicious canning adventures to and I've been drooling over the pesto recipes for a couple months. I never have good luck growing basil. I can do thyme, oregano, mint....all the ones that grow like weeds, but the perfection of basil escapes me. My cousin's little crop was beautiful....the bubbly green leaves were healthy and sprouting all over the sides of her planter. Alas, I buy mine.
My first pesto experience was when I was 16. I was head over heels in love with a boy who bagged groceries at our local market. He had the most beautiful brown eyes and we made out for hours in his blue ford tempo with Soundgarden and Stone Temple Pilots droning on in the background, occasionally looking out the fogged up windsheild at the stars. I thought for sure that he was going to be it. He invited me home to his family's house for dinner and his mother made a big pile of fettucini with pesto on the side. It looked delicious, the vibrant, green paste lay thick on the noodles. I was running my buns off with the Cross Country team so I was starving, not to mention, with all that making out, what teenager isn't starving? So I loaded my plate high and took a bite. I thought it tasted nasty. They had cloth napkins so there was no way to get rid of the evidence. They had a huge family and it would definitely be rude not to eat what I had taken. So I swallowed as much as I could bear and still left a considerable amount on my plate. I was so embarrassed!
As an adult, your tastes change. Things you didn't use to like take on new and different levels of flavor, depth, texture and while they may evoke memories from long ago, new memories begin to take over. I'm glad I love pesto now! Drizzled on garlic bread, goat cheese tarts, fresh tomatoes from my garden with fresh buffalo motzarella, bruschetta, pizzas.....I digress. So simple a baboon could make it. But my only qualm for this was when did pine nuts get so expensive? I paid around $10 for 3/4 cup at a particular market in BC. I feel like I got a good 2 cup container way back at Nino Salvaggios for much less. Courtney got a 10 oz pkg at Trader Joe for around 8 bucks so I felt ripped off. Whatever, you forget all about that after you taste it.
3 cups basil leaves
2/3 cup parmiggiano reggiano
2/3 cup pine nuts
1/3 cup olive oil
1/2 tsp salt
1/4 tsp pepper
4 cloves of garlic
Throw all the ingredients except the olive oil on the bowl of your food processor and drizzle olive oil down the chute and pulse till it resembles a green gunge. Will keep in the fridge for 2 days otherwise freeze it. Its cool if you you an ice cube tray, pesto ice cubes could really perk up a winter soup.

Monday, September 19, 2011

Pastapalooza 2011


I am addicted to cooking. Its fun. I like the way elements come together and form something magical in your mouth. It all started when I was a little kid in Grandma's kitchen. My grandma always let me and my brother make pancakes before church on Sunday mornings. I imagine now her counters and floors must have been sticky from the syrup and she probably cleaned up after us with a smile on her face thinking of how much fun we had making shapes out of the batter. She taught me how to make pies, cookies and sticky buns. I've always failed miserably at yeast bread but she gave me an outlet for creativity and curiosity that is still with me to this day. Whenever I eat blueberry pie, I think of my first blueberry pie in a small pyrex dish with lumps of white sugar that never melted down.
So enough nostalgia, and fast forward about 15 or so years. My cousin Courtney and I are 4 years apart and we're more like sisters than cousins. She even tells her little girl I am Auntie, which I adore. We've shared a lot of fun times and we both share the "foodie passion" although she out does me in just about everything, I applaud her and her endeavors. This weekend, we decided to try out her dusty pasta rollers for the Kitchen aid mixer she got as a wedding gift about 7 years ago? I have been skimming the internet for a pasta machine for about 2 years now and I wanted to try it out before I make any decisions. It seemed like a huge undertaking and we were both a little leary. She had been wanting to make pasta too so we scheduled the weekend.
I canned 11 pints of pasta sauce and she stocked up on flour by buying a 25 lb bag! We stopped at her local gourmet food market for italian sausage, $3.50 can of tomatoes, semolina flour and other various goodies for our big day. The baby was up all night so Saturday morning got off to a bumpy start but once we get busy, there's no stopping us.....seemingly a family trait! I started with the basic pasta dough out of Molto Italiano, Mario Batali's cookbook and rolled out some lasagna noodles. It was so easy! Then I made the butternut squash ravioli. Then I made mushroom ravioli out of Williams Sonoma's Pasta cookbook. While I was busy doing that, Courtney made homeade ricotta cheese from Smitten Kitchen blog and made bolognese sauce in the crockpot. We then cut our remaining dough into fettucini noodles and Courtney assembled the lasagna.
Courtney's mom and my lovely Aunt Kathy came over. Our dear friend Lisa and even Grandma came out to enjoy! We sipped wine, noshed on garlic bread and dove headfirst into one of the best lasagnas I've ever had! But that wasn't all, Courtney made a chocolate ravioli with cocoa powder and then she stuffed it with raspberry marscapone cheese and topped it with her swiss merange and a side of vanilla bean gelato. Raspberries were the final garnish. Why didn't we think to put a mint sprig on it? Even so, it was very tasty after she crisped it in a frying pan with butter. With our stomachs bulging, we called it a night.
Sunday, we were back at it. Courtney made fresh ricotta gnocchi, while I went to work on the ravioli. I boiled the mushroom ravioli and whipped up the Williams sonoma's alfredo sauce. So rich and buttery that it melted on your tongue. Within seconds we had devoured it! Courtney looked into my eyes to see what I would say, which was "needs more salt", but she disagreed. She said it was really good, which coming from her, its a comment I will treasure.
Next, I made the butternut squash ravioli. I boiled it then tossed it in a hot pan with butter and sage leaves, topped with parmiggiano reggiano....the epitome of a sunny fall day.
We divided the spoils of our hard work and I packed up my mixer and cuisinart and said goodbye. I just can't wait for our next project, and I promise I will clean up my mess as I go next time and not take up all your counterspace! Other than that, we make an excellent team. I agree, I wish I lived closer. I think we will keep saying that for the rest of our lives!

Sunday, September 11, 2011

Game Day Eats


Its fall in Michigan and you know what that means.....Football! Who wants to root for their favorite team on an empty stomach? I get to leave work early on Fridays and that gives me just enough time to start on a good meal before my honey gets home from work. I fired up the crockpot and got my oven blazing to create these favorites. Super easy and super good. Now bring on some gridiron action!
In my previous blog I mentioned how I have stockpiled all this food at home. I had tomatoes, beans, sauce and veggies right here at home, and a box of jiffy cornmeal muffin mix to boot. All I bought was the ground beef and italian pork sausage. I feel like I am on a roll cooking things from our well stocked pantry! But then, any cook knows you have to have I decided to make my mini game day quiches too. I derived this recipe from one a co worker had given me years ago, and again I had all the stuff right in my fridge so why not use it up?
Game day Chili (adapted from Better Homes and Gardens Cookbook)
Makes 10 1 cup servings
1 lb ground beef
1 roll of bob evans italian pork sausage
1 large onion chopped
4 cloves of garlic minced
2 cans of tomatoes I had one with green chilis and 1 can with onions undrained
1 can of chili beans undrained
1 can light kidney beans drained and rinsed
1 can tomato sauce
4 tbsp chili powder
2 tbsp hot chili powder
1 tsp dried basil
1/2 tsp pepper
Brown the meat and onions and garlic in a pan till meat is cooked through and onion is tender. Drain the fat off the meat and return to pan and sprinkle chili powders over meat and mix well. Add rest of ingredients to crockpot, stir till all is mixed cover and cook for 4 hours or until its hot and you just can't wait any longer! Dont forget the sour cream, cheese for garnish and jalepeno slices to garnish!
Mini Quiches
Makes 24 mini quiches
Preheat Oven to 350
Shell:
1 Cup Flour
1/2 cup butter
3 oz Cream Cheese
Filling:
2 eggs
1/2 C whipping cream
salt and pepper
ham cubes
spinach
sharp cheddar cheese
Frozen chopped spinach
Put flour, butter and cream cheese in the bowl of a food processor fitted with the dough blade. Pulse ingredients until they form a dough ball. Wrap in plastic wrap and refrigerate for 1 hour.
Take from fridge and pinch off portions to fit 24 mini muffin cups. Work the dough around till it makes a mini crust in each well of the mini muffin tin.
In a separate bowl whisk together the eggs, cream and salt and pepper to taste. I always use sea or kosher salt and fresh ground pepper. Set aside.
In each well put a pinch of shredded cheddar cheese, 2 ham cubes and about a teaspoon of chopped spinach, then about a tablespoon of the egg mixture.
Bake for 30-35 Minutes or until brown.
The original recipe that I had called for a 4 oz can of green chilis and monterrey jack cheese but you can make any combos you like, how about some bacon and swiss cheese or jalepenos and salsa!!! These game day bites score a touchdown in my book!

Saturday, September 10, 2011

White peach cobbler and farewell to summer days


My boyfriend and I had a very long day cheering on our favorite college football team today. By the time we made it home, we were starving. He is always telling me how I keep packing the fridge full of food and then it just gets thrown out. Well, I am not going to let that happen anymore. I've decided to boycott going to the grocery store for the next few weeks before we take our vacation to Hawaii. I've been stockpiling food for months as a result of my failed attempts at extreme couponing. All I ended up doing was spending a bunch of money buying things I don't really need.

My boyfriend goes to the farmer's market every week. This week he brought me home 6 white peaches, being the thoughtful guy that he is. Peaches ripen very fast and last week we threw out the ones we bought. I did have to cut out some of the bad spots, but you'd never know it after how delicious this cobbler turned out!! The white peaches flesh is slightly more tart and tangy than the red havens I canned earlier this summer, but they sure are luscious. I got this recipe out of the good old Better Homes and Gardens cookbook. Get some peaches of your own and whip this up now!

1 Cup Flour
2 Tbsp Sugar
1- 1/2 tsp baking powder
1/4 Cup butter
2/3 Cup Sugar
1 Tbsp Cornstarch
1 egg
1/4 milk ( I used 1/4 Cup heavy cream because I wanted to use mine up.)
The recipe also calls for water to be added to the peaches but I didn't see that when I was making it and mine still turned out.

Stir together flour, 2 tbsp sugar, baking powder. Cut in butter set aside

In a saucepan, combine peaches and 2/3 c sugar and cornstarch and heat till bubbling.

Stir together egg and cream and add to flour mixture till moistened.

Dump peach mixture to baking dish and drop cobbler dough onto the peaches in globs. It will be sticky but try to make an even layer over the peaches. Bake at 400 for 25 minutes. Make sure your oven is preheated!!

Serve this up with vanilla ice cream!!
Its now September and we won't have many more beautiful days like this and when winter's chill is in the air, this cobbler will remind me of summer's last days!